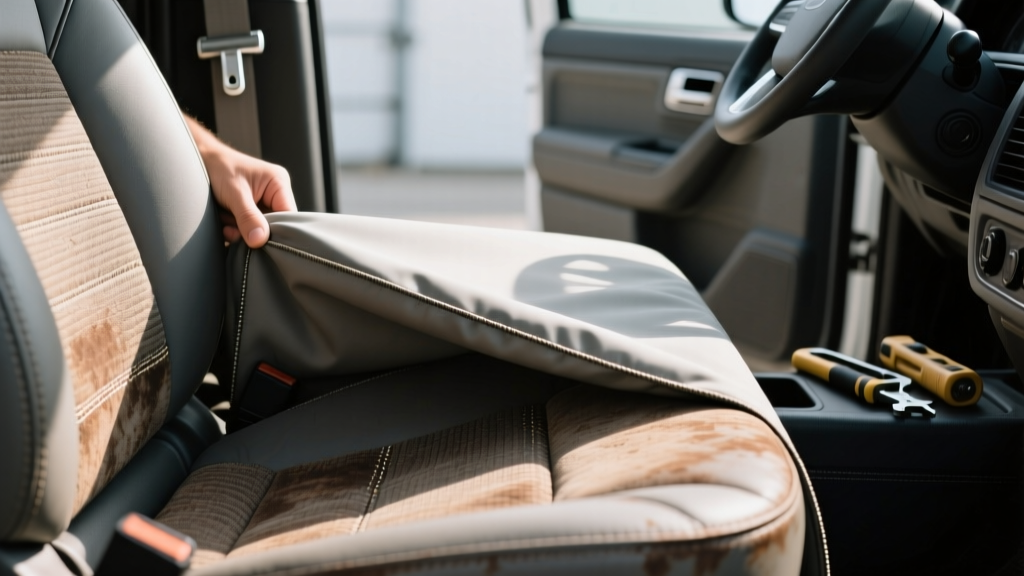
Commercial Vehicle Seat Cover Removal Guide - CarInteriorMix
Commercial vehicles work harder than most personal cars. Between daily routes, job sites, shift changes, and constant in-and-out traffic, the seats take a beating?spills, grime, sweat, tools, and sharp edges all leave their mark. That?s why seat covers are so common in work vans, pickups, and fleet vehicles. They protect the upholstery, improve comfort, and can even make an older cab feel presentable again.
But eventually every seat cover needs to come off?whether you?re deep-cleaning, replacing a torn cover, upgrading to a better-fitting option, or doing repairs like an airbag recall, seat heater fix, or foam replacement. Removing seat covers on commercial vehicles isn?t difficult, but it?s different from most passenger cars. You?ll run into heavier-duty attachment systems, bench seats, modular seat bases, integrated airbags, and accessories like seat-mounted tool holsters or armrests.
This guide walks you through safe, practical commercial vehicle seat cover removal step by step, with real-world tips that help you avoid broken clips, torn fabric, and warning lights on the dash.
Before You Start: Identify What You?re Working With
Seat cover type (universal vs. custom)
Most commercial vehicle seat covers fall into two categories:
- Universal seat covers: Looser fit, often secured with straps and basic hooks. Easier to remove, but sometimes snaggy and prone to shifting.
- Custom-fit seat covers: Tight fit and typically secured with precise anchor points (J-clips, hog rings, buckles, or Velcro channels). Cleaner look, slightly more effort to remove.
Seat style (bucket, bench, suspension, or modular)
- Bucket seats (common in pickups and vans): Usually easiest?separate seat back and bottom contours.
- Bench seats (3-across truck/van benches): More material, more anchor points, and sometimes a fold-down console section.
- Suspension seats (some heavy-duty trucks): Extra hardware, moving bases, and more pinch points under the seat.
- Modular seats (fleet upfits): May have added equipment brackets, partitions, or storage bases that limit access.
Airbag and sensor considerations (very important)
Many late-model commercial vehicles have side airbags in the seat back, occupancy sensors, and seatbelt pretensioners. The seat cover might be ?airbag compatible? with a tear seam. When removing a seat cover:
- Avoid yanking hard around the outer seat bolsters where airbags may deploy.
- Do not unplug seat wiring unless you know the correct procedure (or you?ll risk an airbag/SRS warning light).
- If you must unplug connectors, disconnect the battery and wait before touching airbag-related plugs.
Tools and Supplies That Make the Job Easier
You can remove many seat covers with just your hands, but commercial setups are often tighter and dirtier. Having the right tools saves time.
- Trim removal tool (plastic pry tool): Helps release clips without damaging plastic panels.
- Needle-nose pliers: Great for stubborn hooks, elastic loops, and hog ring removal.
- Hog ring pliers (optional): If your cover uses hog rings and you plan to reinstall or replace with hog rings.
- Small flathead screwdriver: Useful for lifting J-clips carefully (use gently to avoid tearing fabric).
- Work gloves: Under-seat hardware can be sharp; gloves also help with grime.
- Headlamp or flashlight: You?ll be working under the seat where lighting is poor.
- Shop towel and interior cleaner: Perfect time to clean exposed upholstery and foam.
- Zip ties (for reinstallation): Useful if a strap buckle breaks and you need a temporary secure hold.
Safety First: Quick Precautions
- Park on level ground and engage the parking brake.
- Slide the seat back to access front anchors, then slide forward for rear anchors (if the seat is adjustable).
- Disconnect the battery if you plan to unplug seat wiring. As a general rule, wait at least 10?15 minutes before touching any SRS-related connectors.
- Take photos as you go. A few quick shots of strap routing and clip locations make reinstallation much faster.
Step-by-Step: How to Remove Commercial Vehicle Seat Covers
Step 1: Clear the seat and inspect attachment points
Remove anything attached to the seat first:
- Seatbelt comfort pads
- Clip-on tool holders
- Aftermarket armrest covers
- Lumbar cushions and massage pads
Then feel along the sides and under the seat for:
- Elastic straps and quick-release buckles
- Metal S-hooks
- J-clips that tuck into seat seams
- Velcro flaps
- Hog rings (common on heavy-duty or older-style cover installs)
Step 2: Release under-seat straps, hooks, and buckles
Most seat bottoms are anchored underneath. Start there so the cover can loosen gradually.
- Locate the front straps first. They?re usually easiest to reach.
- Unclip buckles or unhook S-hooks by hand or with pliers.
- Work side to side. Don?t remove only one side completely while the other side is still tight?this can tear seams.
- Label straps if needed (left/right) with masking tape on custom covers.
Real-world tip: If a strap is buried between the seat base and center console, slide the seat all the way back or forward to open a gap. On tight fleet vans, you may need to recline the seat back slightly to reach rear anchors.
Step 3: Free the seat bottom cover
Once the underside is unfastened, peel the cover upward from the seat base.
- If the cover has a J-clip tucked into the seat seam, gently lift the seam edge and pull the clip out lengthwise.
- If there?s Velcro, pull slowly to avoid ripping the loop fabric or foam backing.
- If you see hog rings, use needle-nose pliers to twist and open them. Plan to replace hog rings?reusing old ones can lead to sharp edges and weak hold.
Example: On many work-truck neoprene covers, the seat bottom may have a ?skirt? with elastic and hooks. Pull the skirt upward evenly, then release hooks last so you don?t overstretch the elastic.
Step 4: Remove the headrest cover (if applicable)
Some commercial seat covers include a headrest sleeve. Remove it early to prevent snagging later.
- Raise the headrest (if adjustable).
- Unzip or un-Velcro the back of the headrest cover.
- Slide the cover upward off the headrest.
If the headrest is built-in (common on some bench or fleet seats), the cover may be integrated?leave it until the seatback cover is loosened.
Step 5: Remove the seatback cover (watch for airbags)
The seatback is often secured with a zipper, Velcro flap, or straps behind the seat.
- Start at the bottom rear of the seatback and undo any zipper/Velcro closure.
- Release rear straps if present.
- Roll the cover upward like peeling a sleeve, keeping tension even across both sides.
- Work carefully around side bolsters. If the seat has a side airbag tag or seam, avoid pulling aggressively in that area.
Pro tip for airbag-compatible covers: If the cover has an ?airbag seam? panel on the outer side, support that section with one hand while you peel the cover with the other. This reduces stress on the seam stitching.
Step 6: Deal with armrests, consoles, and pass-throughs
Commercial seats often have extras:
- Fold-down armrests: Covers may have a separate armrest sleeve that must be removed first.
- Seat-mounted seatbelt: Some vehicles have belts anchored to the seat; the cover may have a routed opening.
- Bench seat console section: You may have separate cover pieces for driver, middle, and passenger.
If the cover is snagging, stop and look for a hidden strap or Velcro tab routed through a gap between cushions.
Step 7: Inspect the seat and clean while it?s exposed
With the cover off, take advantage of the access:
- Vacuum crumbs, sand, and metal filings from seams.
- Wipe vinyl/leather with a suitable cleaner and a microfiber towel.
- For cloth seats, use a fabric cleaner and lightly agitate heavy grime.
- Check for foam breakdown, broken bolsters, or torn upholstery seams?common in high-mileage fleet units.
Product Recommendations: What Helps During Removal (and What to Consider Next)
Helpful removal/installation accessories
- Trim tool kit (plastic): Best for prying without damage. Worth having if you work on interiors regularly.
- Hog ring kit (pliers + rings): Ideal if you?re reinstalling heavy-duty covers that use rings instead of straps.
- Interior cleaner matched to material: Use vinyl/leather cleaner for coated surfaces and fabric cleaner for cloth.
Choosing replacement seat covers for commercial use
If you?re removing covers because they?re worn out, consider what failed and upgrade accordingly:
- Neoprene-style: Comfortable and snug, good for daily driving; can hold heat in hot climates.
- Canvas/duck cloth: Tough and abrasion-resistant, great for contractors; can feel rougher and may attract dust.
- Faux leather (PU): Easy wipe-down for delivery or rideshare-style use; cheaper versions can crack with extreme heat/cold cycles.
- Genuine leather: Premium feel, higher cost, needs care; usually chosen for owner-operators more than fleets.
Quick comparison for work trucks and vans:
- Best for muddy/dirty jobsites: canvas/duck cloth
- Best for frequent food/coffee spills: faux leather (easy wipe)
- Best for all-season comfort: neoprene-style (if heat retention isn?t a dealbreaker)
Common Mistakes to Avoid
- Yanking the cover off without finding all anchors: This is how seams rip and foam tears. If it won?t move, there?s still a strap, clip, or ring holding it.
- Ignoring seat airbags: Rough handling near the outer seatback bolster can damage airbag seams or wiring routes.
- Unplugging seat connectors with the battery connected: This can trigger SRS/airbag warning lights and may require a scan tool to clear.
- Cutting straps as a shortcut: It?s tempting on stubborn universal covers, but it turns a reusable cover into trash and can leave sharp remnants.
- Forgetting strap routing: Many covers use crisscross straps underneath. Take photos so the cover doesn?t bunch up when reinstalled.
- Reusing old hog rings: They can snap, loosen, or leave sharp edges that wear through the cover over time.
Troubleshooting: When Seat Covers Won?t Come Off
The cover feels ?glued? to the seat
Usually it?s Velcro or a tight J-clip in a seam channel. Work slowly along the seam and release a few inches at a time.
You can?t reach the rear straps
Try these options:
- Slide the seat all the way forward and recline the seatback.
- Use a flashlight and long needle-nose pliers.
- If access is blocked by an upfit base or partition, consider loosening the seat mounting bolts (only if you?re comfortable doing so and following manufacturer torque specs).
The seat has an integrated seatbelt or unusual hardware
Look for a dedicated pass-through opening in the cover. If the cover was installed incorrectly, it may be looped around hardware in a way that locks it in place.
FAQ: Commercial Vehicle Seat Cover Removal
Do I need to remove the entire seat to take off the seat cover?
Usually no. Most seat covers can be removed with the seat installed by sliding it forward/back and reclining the seatback for access. You might remove the seat only if an upfit blocks access to rear straps or if the cover uses hog rings in tight areas.
Will removing a seat cover trigger an airbag light?
Removing the fabric cover itself won?t trigger a light. The issue happens when you unplug seat wiring with the battery connected or damage a connector. If you must unplug anything under the seat, disconnect the battery first and wait before touching airbag-related connectors.
What are hog rings, and do all commercial seat covers use them?
Hog rings are small metal rings crimped to secure upholstery or seat covers to seat frame wires. Not all covers use them?many modern custom covers use straps and clips?but hog rings are common in heavy-duty installs or older setups.
Can I wash my commercial seat covers after removing them?
Depends on the material. Many neoprene-style and canvas covers can be hand-washed or gently machine-washed (check the label). Faux leather typically should be wiped down rather than soaked. Always air-dry?high heat can shrink or warp materials.
My seat cover has a tear seam for airbags. Can I sew it if it?s coming apart?
Avoid DIY stitching on airbag tear seams. That seam is designed to release in a specific way during deployment. If it?s damaged, replace the cover with an airbag-compatible model designed for your exact seat.
How do I keep the new cover from sliding around after reinstalling?
Make sure straps are routed correctly (often crisscrossed under the cushion), tighten evenly side-to-side, and confirm the J-clips/Velcro are fully seated. A cover that?s slightly crooked at the start will migrate more with daily entry/exit.
Next Steps: Remove Cleanly, Inspect, Upgrade Smart
If you take one thing from this guide, make it this: slow, even tension beats brute force. Work from the underside first, release every anchor point you find, and treat seat airbags and wiring with respect. Once the cover is off, clean the seat thoroughly and check for wear that could shorten the life of the next cover?like collapsed foam or broken trim that rubs holes over time.
Ready for the next project? Explore more practical interior care and upgrade guides on carinteriormix.com to keep your work vehicle looking sharp and working comfortably mile after mile.